Develop an Azure AI agent with the Semantic Kernel SDK
In this exercise you’ll use Azure AI Agent Service and Semantic Kernel to create an AI agent that creates an expense claim email.
This exercise should take approximately 30 minutes to complete.
Create an Azure AI Foundry project
Let’s start by creating an Azure AI Foundry project.
-
In a web browser, open the Azure AI Foundry portal at
https://ai.azure.comand sign in using your Azure credentials. Close any tips or quick start panes that are opened the first time you sign in, and if necessary use the Azure AI Foundry logo at the top left to navigate to the home page, which looks similar to the following image: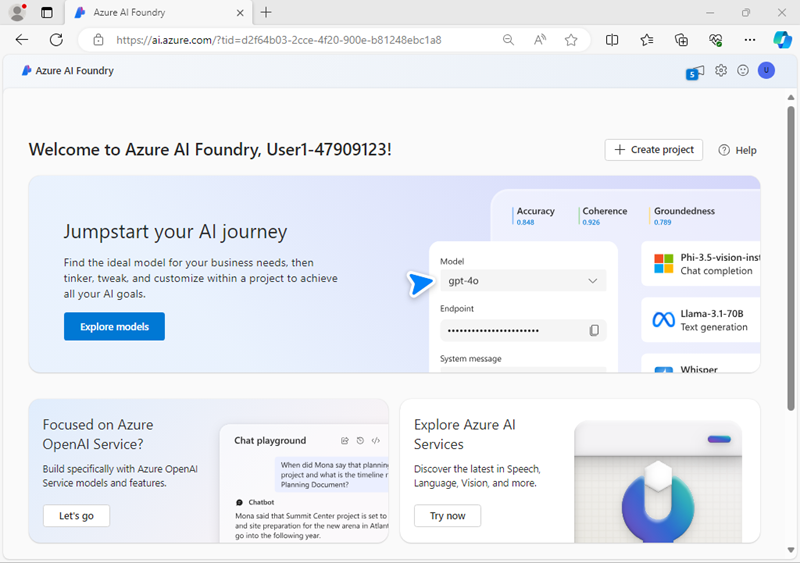
- In the home page, select + Create project.
- In the Create a project wizard, enter a suitable project name for (for example,
my-ai-project) and if an existing hub is suggested, choose the option to create a new one. Then review the Azure resources that will be automatically created to support your hub and project. - Select Customize and specify the following settings for your hub:
- Hub name: A unique name - for example
my-ai-hub - Subscription: Your Azure subscription
- Resource group: Create a new resource group with a unique name (for example,
my-ai-resources), or select an existing one - Location: Location: Select any of the following regions*:
- East US
- Japan East
- UK South
- West US
- Connect Azure AI Services or Azure OpenAI: Create a new AI Services resource with an appropriate name (for example,
my-ai-services) or use an existing one - Connect Azure AI Search: Skip connecting
* At the time of writing, the OpenAI gpt-35-turbo model we’re going to use in this exercise is available for use with agents in these regions. You can check the latest regional availability for specific models in the Azure AI Foundry documentation. In the event of a regional quota limit being reached later in the exercise, there’s a possibility you may need to create another resource in a different region.
- Hub name: A unique name - for example
- Select Next and review your configuration. Then select Create and wait for the process to complete.
-
When your project is created, close any tips that are displayed and review the project page in Azure AI Foundry portal, which should look similar to the following image:

- In the project overview page, in the Project details area, note the Project connection string. Later, you’ll use this connection string to connect to your project in a client application.
Deploy a generative AI model
Now you’re ready to deploy a generative AI language model to support your agent.
- In the toolbar at the top right of your Azure AI Foundry project page, use the Preview features icon to ensure that the Deploy models to Azure AI model inference service feature is enabled. This feature ensures your model is deployed to the Azure AI Inference service.
- In the pane on the left for your project, in the My assets section, select the Models + endpoints page.
- In the Models + endpoints page, in the Model deployments tab, in the + Deploy model menu, select Deploy base model.
- Search for the
gpt-35-turbomodel in the list, and then select and confirm it. -
Deploy the model with the following settings by selecting Customize in the deployment details:
It's important to choose exactly these settings - otherwise your agent may not work
- Deployment name: A unique name for your model deployment - for example
gpt-35-turbo(remember the name you choose - you’ll need it later) - Deployment type: Standard
- Model version: 0125
- Connected AI resource: Select your Azure OpenAI resource connection
- Tokens per Minute Rate Limit (thousands): 10K
- Content filter: DefaultV2
- Enable dynamic quota: Enabled
Note: Reducing the TPM helps avoid over-using the quota available in the subscription you are using. 10,000 TPM should be sufficient for the data used in this exercise. If you later experience a Rate Limit Reached error, you can edit the model deployment to increase this value.
- Deployment name: A unique name for your model deployment - for example
- Wait for the deployment provisioning state to be Completed.
Create an agent client app
Now you’re ready to create a client app that defines an agent and a custom function. Some code has been provided for you in a GitHub repository.
Prepare the environment
- Open a new browser tab (keeping the Azure AI Foundry portal open in the existing tab). Then in the new tab, browse to the Azure portal at
https://portal.azure.com; signing in with your Azure credentials if prompted. -
Use the [>_] button to the right of the search bar at the top of the page to create a new Cloud Shell in the Azure portal, selecting a PowerShell environment. The cloud shell provides a command line interface in a pane at the bottom of the Azure portal.
Note: If you have previously created a cloud shell that uses a Bash environment, switch it to PowerShell.
-
In the PowerShell pane, enter the following commands to clone the GitHub repo containing the code files for this exercise:
rm -r ai-agents -f git clone https://github.com/graememalcolm/ai-agents ai-agentsTip: As you enter commands into the cloudshell, the ouput may take up a large amount of the screen buffer and the cursor on the current line may be obscured. You can clear the screen by entering the
clscommand to make it easier to focus on each task. -
When the repo has been cloned, enter the following command to install the required version of Python in the cloud shell:
sh ~/ai-agents/update-python.sh -
After the installation is complete, in the cloud shell toolbar, in the Settings menu, select Go to Classic version (this starts a new session, and is required to use the code editor).
Ensure you've switched to the classic version of the cloud shell and a new session has started before continuing.
-
Enter the following command to change the working directory to the folder containing the code files and list them all.
cd ai-agents/labfiles/semantic-kernel/python
ls -a -l
The provided files include application code and a file for configuration settings.
Configure the application settings
-
In the cloud shell command line pane, enter the following command to install the libraries you’ll use:
pip install python-dotenv azure-identity semantic-kernel[azure]Note: Installing semantic-kernel[azure] autmatically installs a semantic kernel-compatible version of azure-ai-projects.
-
Enter the following command to edit the configuration file that has been provided:
code .envThe file is opened in a code editor.
- In the code file, replace the your_project_connection_string placeholder with the connection string for your project (copied from the project Overview page in the Azure AI Foundry portal), and the your_model_deployment placeholder with the name you assigned to your gpt-35-turbo model deployment.
- After you’ve replaced the placeholders, use the CTRL+S command to save your changes and then use the CTRL+Q command to close the code editor while keeping the cloud shell command line open.
Write code for an agent app
Tip: As you add code, be sure to maintain the correct indentation. Use the existing comments as a guide, entering the new code at the same level of indentation.
-
Enter the following command to edit the agent code file that has been provided:
code semantic-kernel.py - Review the code in the file. It contains:
- Some import statements to add references to commonly used namespaces
- A main function that defines data for an expense claim (in a real application, this would likely be submitted as a file) and then calls…
- A create_expense_claim function in which the code to create and use your agent must be added
- An EmailPlugin class that includes a kernel function named send_email; which will be used by your agent to simulate the functionality used to send an email.
-
IAt the top of the file, after the existing import statement, under the comment Add references, add the following code to reference the namespaces in the libraries you installed previously:
from dotenv import load_dotenv from azure.identity.aio import DefaultAzureCredential from semantic_kernel.agents.azure_ai import AzureAIAgent, AzureAIAgentSettings from semantic_kernel.functions import kernel_function -
In the create_expense_claim function, under the comment Get configuration settings, add the following code to load the configuration file and create an AzureAIAgentSettings object (which will automatically include the Azure AI Agent settings from the configuration).
load_dotenv() ai_agent_settings = AzureAIAgentSettings.create() -
Under the comment Connect to the Azure AI Foundry project, add the following code to connect to your Azure AI Foundry project using the Azure credentials you are currently signed in with:
async with ( DefaultAzureCredential( exclude_environment_credential=True, exclude_managed_identity_credential=True) as creds, AzureAIAgent.create_client( credential=creds, conn_str=ai_agent_settings.project_connection_string.get_secret_value(), ) as project_client, ): -
Under the comment Define an agent that sends an expense claim email, add the following code to create an Azure AI Agent definition for your agent (be sure to maintain the indentation level):
expenses_agent_def = await project_client.agents.create_agent( model= ai_agent_settings.model_deployment_name, name="expenses_agent", instructions="Send an expense claim to expenses@contoso.com with the subject 'Expense Claim`and a body that contains itemized expenses with a total." ) -
Under the comment Create an instance of the agent, add the following code to create an instance of your agent, including a reference to the EmailPlugin plugin (be sure to maintain the indentation level):
expenses_agent = AzureAIAgent( client=project_client, definition=expenses_agent_def, plugins=[EmailPlugin()] ) -
Under the comment Use the agent to generate an expense claim email, add the following code to create a thread for your agent to run on, and then invoke it with a chat message (be sure to maintain the indentation level):
thread = await project_client.agents.create_thread() try: # Add the user input as a chat message prompt_message = "Create an expense claim for the following expenses: " + expenses_data await expenses_agent.add_chat_message(thread_id=thread.id, message=prompt_message) # Invoke the agent for the specified thread for response response = await expenses_agent.get_response(thread_id=thread.id) print(f"\n# {response.name}:\n{response}") except Exception as e: # Something went wrong print (e) finally: # Cleanup: Delete the thread and agent await project_client.agents.delete_thread(thread.id) await project_client.agents.delete_agent(expenses_agent.id) - Save your code changes (CTRL+S).
Sign into Azure and run the app
You must sign into Azure - even though the cloud shell session is already authenticated.
-
In the cloud shell command line pane beneath the code editor, enter the following command to sign into Azure.
az login - When prompted, follow the instructions to open the sign-in page in a new tab and enter the authentication code provided and your Azure credentials. Then complete the sign in process in the command line, selecting the subscription containing your Azure AI Foundry hub if prompted.
-
After you have signed in, enter the following command to run the application:
python semantic-kernel.pyThe application runs using the credentials for your authenticated Azure session to connect to your project and create and run the agent.
- When the application has finished, review the output. The agent should have composed an email for an expenses claim based on the data that was provided.
Summary
In this exercise, you used the Azure AI Agent Service SDK and Semantic Kernel to create an agent.
Clean up
If you’ve finished exploring Azure AI Agent Service, you should delete the resources you have created in this exercise to avoid incurring unnecessary Azure costs.
- Return to the browser tab containing the Azure portal (or re-open the Azure portal at
https://portal.azure.comin a new browser tab) and view the contents of the resource group where you deployed the resources used in this exercise. - On the toolbar, select Delete resource group.
- Enter the resource group name and confirm that you want to delete it.