Lab: Get started with machine learning
In this lab, you’ll explore Azure Machine Learning, a cloud-based service for training and managing machine learning models. Specifically, you’ll use the Automated machine learning capabilities of the service to train a model using existing data.
Before you start
Before starting this lab, you’ll need a Microsoft Azure subscription.
If you don’t already have an Azure subscription, sign up for a free trial using your Microsoft account at https://azure.microsoft.com/free.
Lab overview
Rosie Reeves has been selling lemonade for a while, and has collected data for each day on which she sold lemonade. Now she wants to use that data to create a model that will predict how much lemonade she is likely to sell on a given day, which will help her ensure that she makes the right amount of lemonade to meet demand.
Exercise 1: Prepare Azure Machine Learning resources
Before you can use Azure Machine learning to train and test a predictive model, you need to prepare a few resources in your Azure subscription.
Create an Azure Machine Learning workspace
As its name suggests, a workspace is a centralized place to manage all of the Azure ML assets you need to work on a machine learning project.
-
Sign into the the Azure portal and on the Home page, click the + Create a resource button and search for Machine Learning. Then create a new Machine Learning resource, specifying the following settings:
- Subscription: Your Azure subscription
- Resource group: Create a resource group with a suitable name, such as azure-ml-resources
- Workspace name: Enter a unique name for your workspace
- Region: Select the geographical region closest to you
- Storage account: Note the default new storage account that will be created for your workspace
- Key vault: Note the default new key vault that will be created for your workspace
- Application insights: Note the default new application insights resource that will be created for your workspace
- Container registry: None
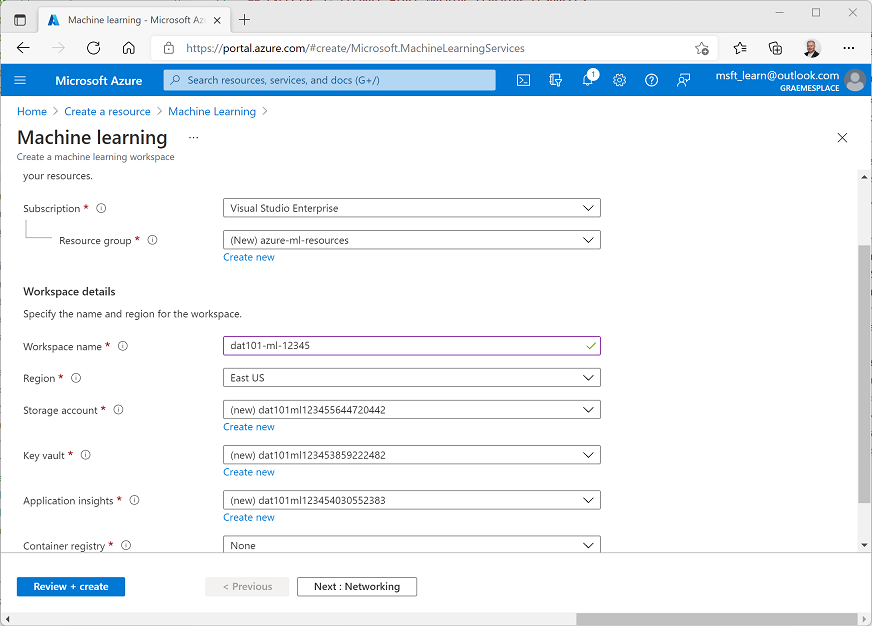
- Click Review + create to validate the settings for your workspace, and then click Create to create it. Deployment of the new workspace may take a minute or so.
-
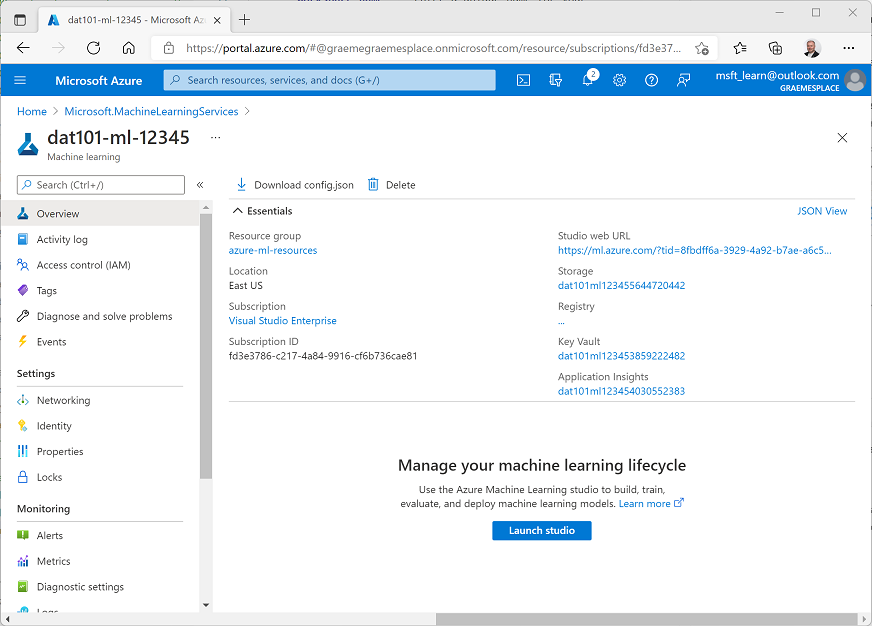
When the workspace and its associated resources have been deployed, use the Go to resource button to view the deployed workspace, which should look like this:
Use Azure Machine Learning to train a regression model
Now that you have created an Azure Machine Learning workspace, you can use Azure Machine Learning to train a machine learning model. Specifically, you are going to use the Azure Machine Learning Studio web-based interface to run an Automated Machine Learning job that applies multiple machine learning algorithms to your data to find the best-performing predictive model.
-
In the Azure portal, on the page for your Azure Machine Learning workspace, click Launch studio. This open Azure Machine Learning Studio in a new browser tab. (If prompted, sign in using the Microsoft account you used in the previous task and select your Azure subscription and workspace.)
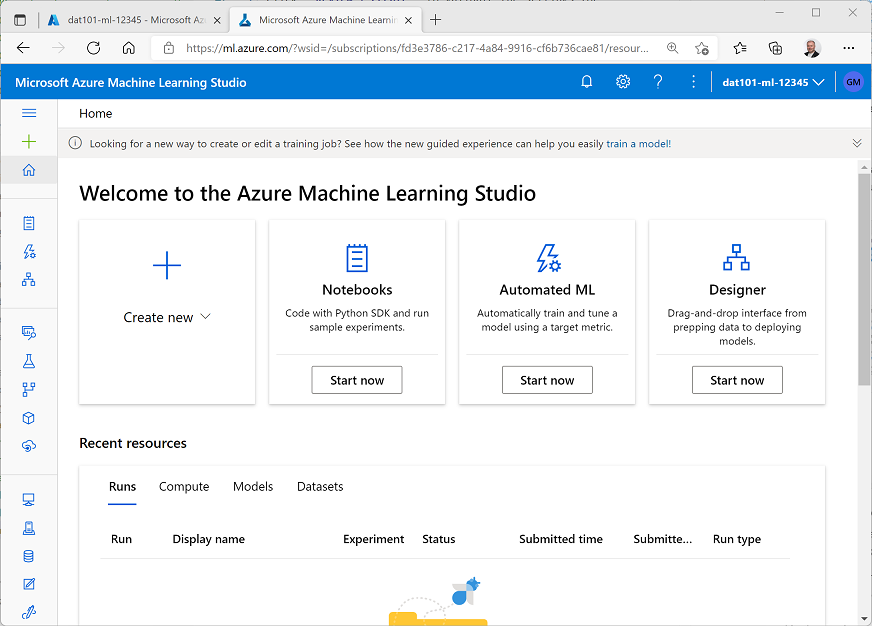
- On the home page in Azure Machine Learning studio, under Automated ML, click Start now.
- On the Automated ML page, click + New Automated ML run.
-
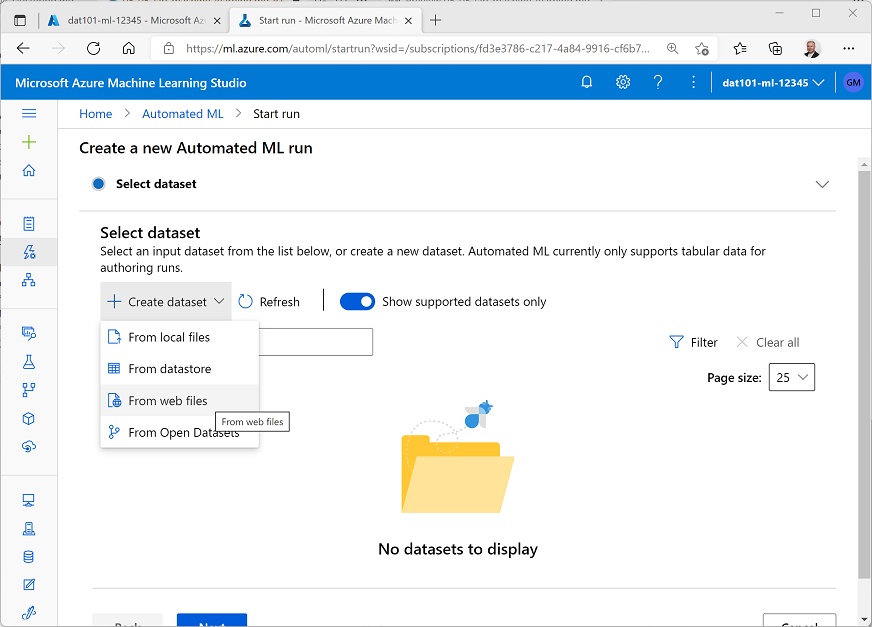
On the Select dataset step, in the + Create dataset list, select From web files:
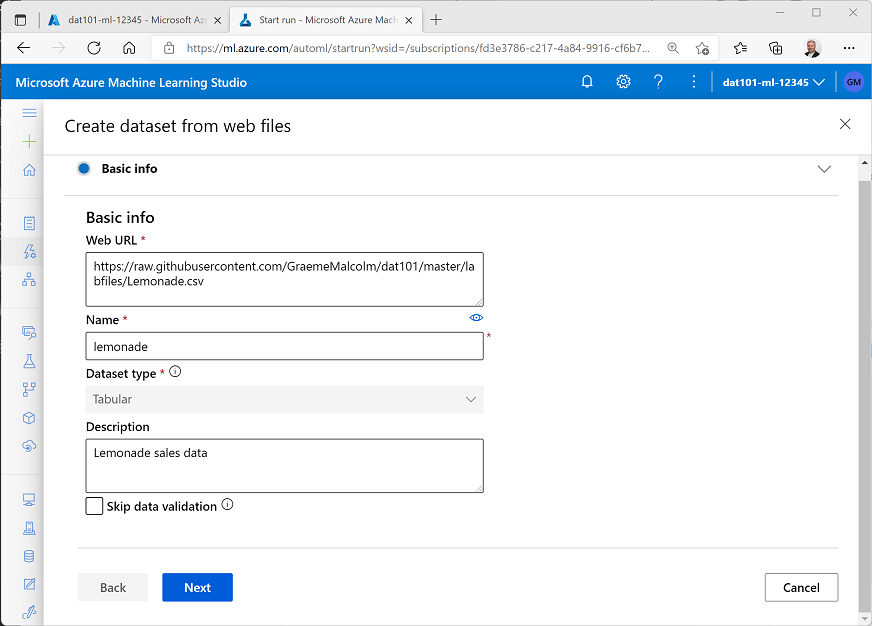
- On the basic info page, enter the following information and then click Next:
- Web URL:
https://raw.githubusercontent.com/GraemeMalcolm/dat101/master/labfiles/Lemonade.csv - Name: lemonade
- Dataset type: tabular
- Description: Lemonade sales data
- Skip data validation: Unelected
- Web URL:
-
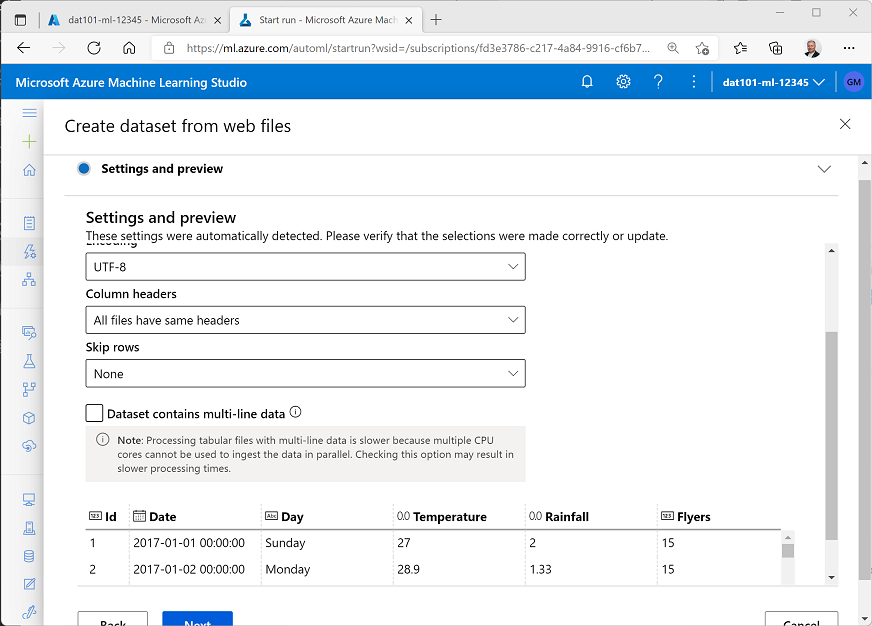
On the Settings and preview page, review the preview of the dataset, which consists of daily records of lemonade sales.
-
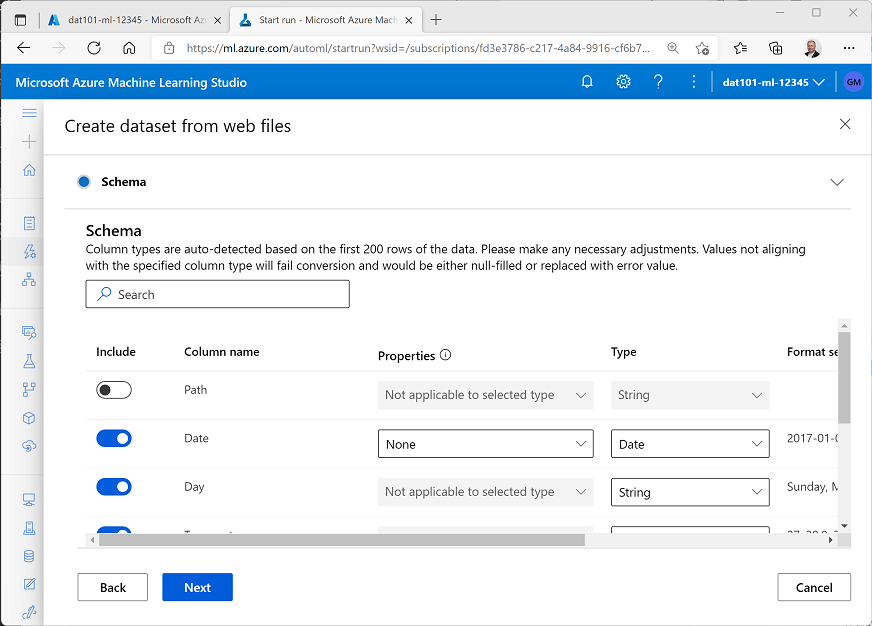
Click Next, and on the Schema page, review the data types identfied for the lemonade data fields, and then click Next:
- On the Confirm details page, click Create to create the dataset.
-
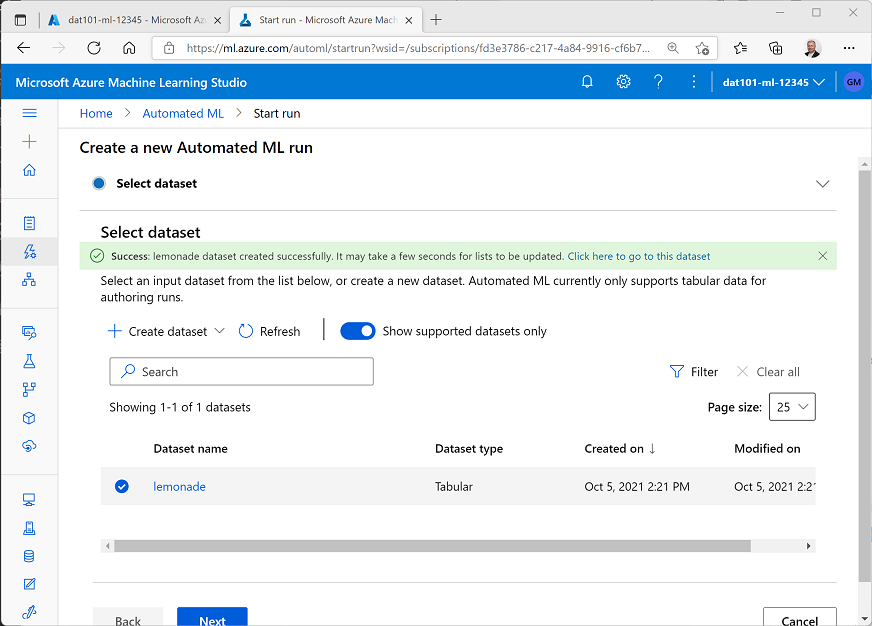
Back on the Select dataset step, click ↻ Refresh until the lemonade dataset is listed. Then select it, and click Next:
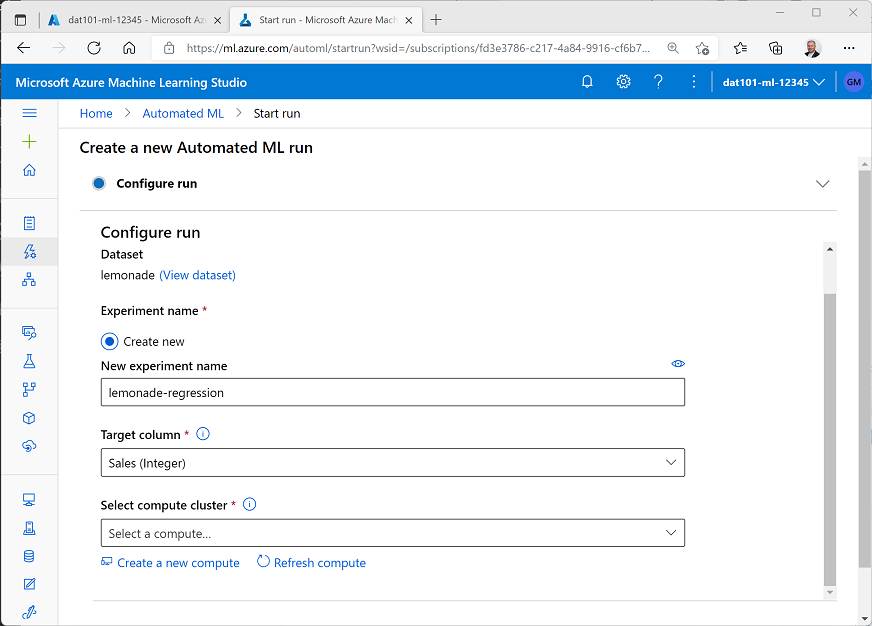
- On the Configure run step, enter the following details:
- Experiment name: Create a new experiment named lemonade-regression
- Target column: Sales
- Select compute cluster: Create a new compute
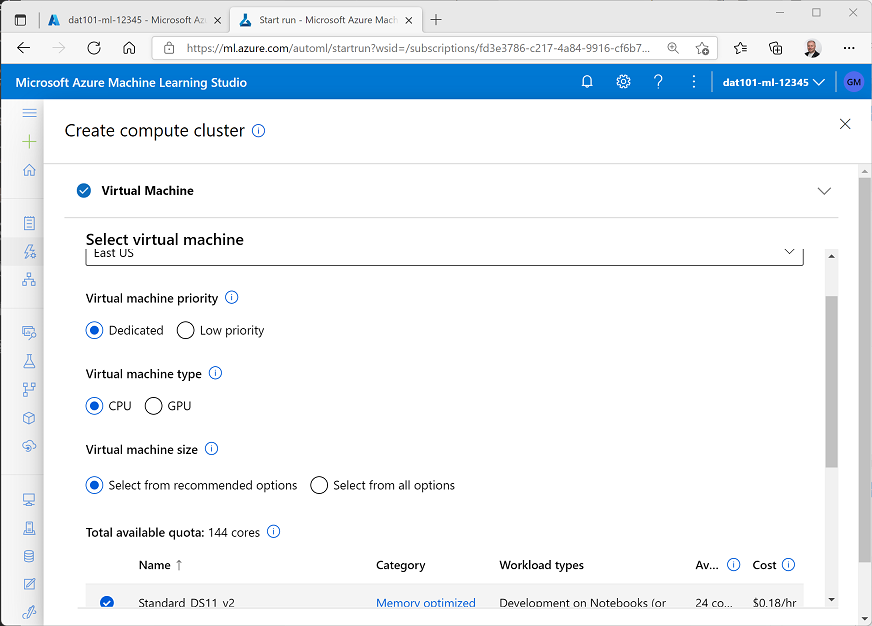
-
On the Create compute cluster page, select the location nearest you, and then in the list of recommended virtual machine options, select Standard_DS11_V2. This defines a compute cluster that will be used to run the automated machine learning training job.
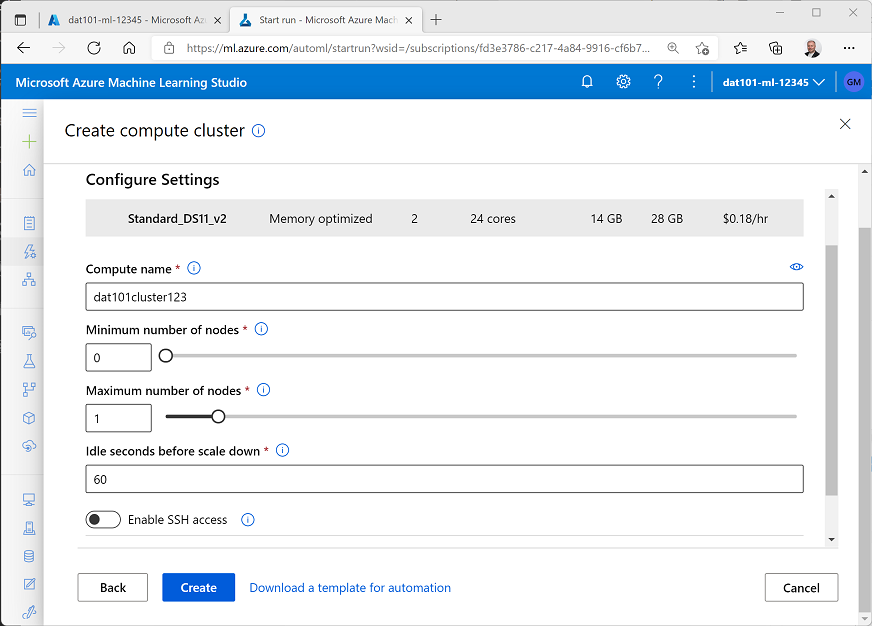
- Click Next. Then, on the Configure settings page, enter the following settings for your compute cluster and click **Create:
- Compute name: enter a unique name
- Minimum number of nodes: 0
- Maximum number of nodes: 1
- Idle seconds before scale down: 60
- Wait for the compute cluster to be created. This may take a minute or so.
-
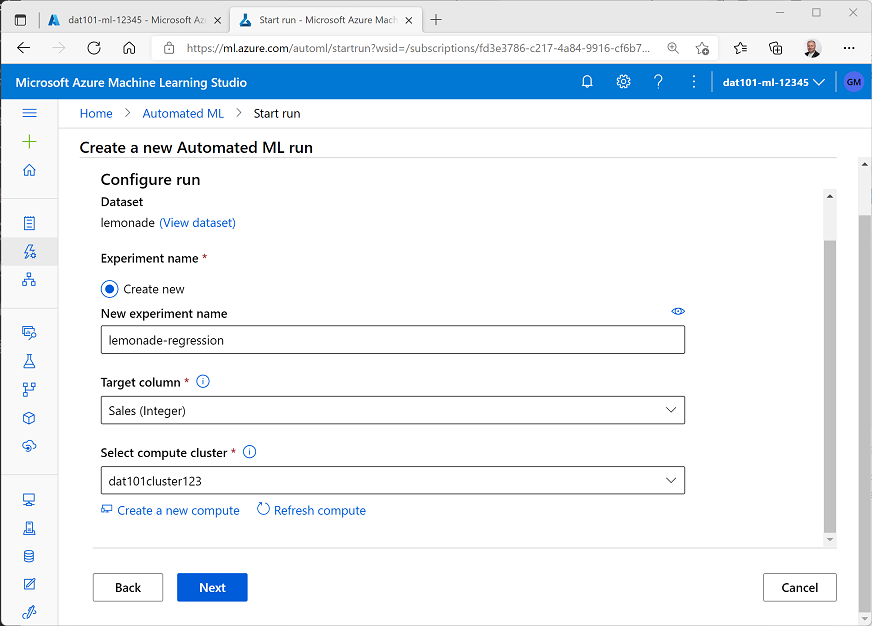
Back on the Configure run step, ensure your new compute cluster is selected and click Next.
-
On the select task type step, select Regression.
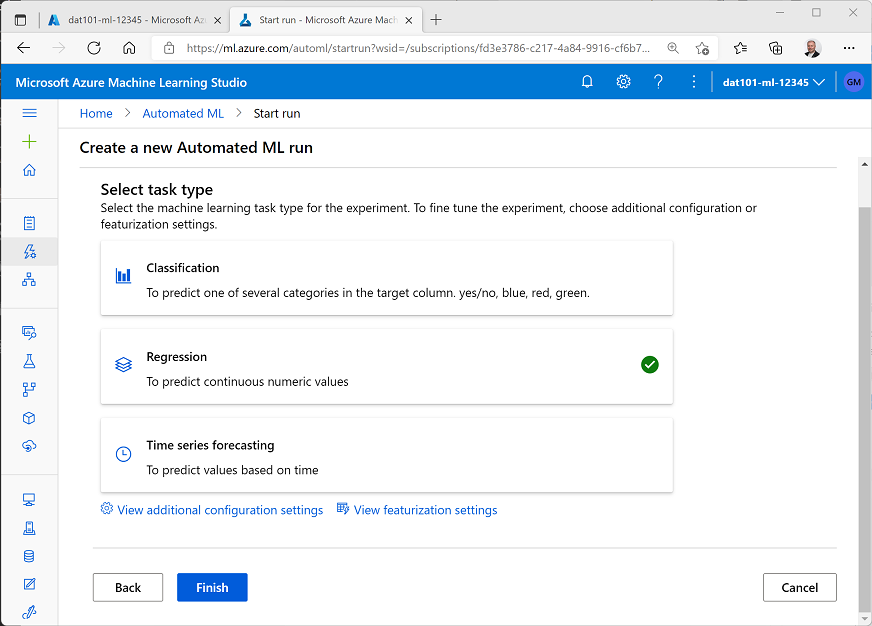
-
With Regression selected, click View additional configuration settings and in the Exit criterion section, set the Metric score threshold to 0.05 as shown below and click Save. This will cause the automated ML training job to end as soon as a model is trained that achieves a score of 0.05 or better for the metric used to measure predictive performance (in this case, normalized root mean squared error).

-
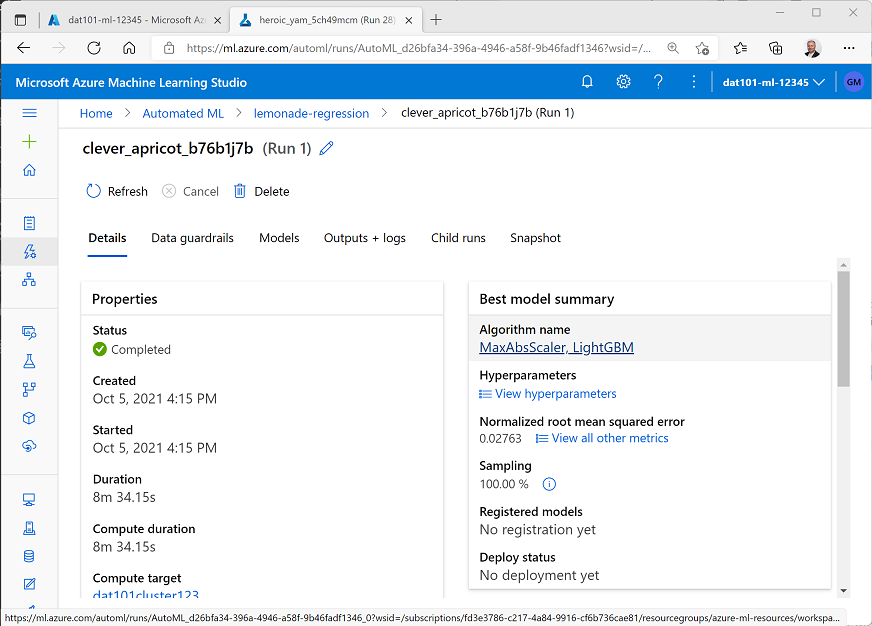
Click Finish and wait for the Automated ML run to start, and note that it is assigned a unique name.

- Wait for the run to complete - this may take several minutes as the run starts the compute, performs data featurization, and then iteratively trains multiple models based on different algorithms until one is produced that matches or exceeds the exit criteria.
Deploy the best model
After a model has been trained, you can deploy it and use it from applications to predict daily sales based on factors such as day of the week, month of the year, weather conditions, and flyers distributed.
-
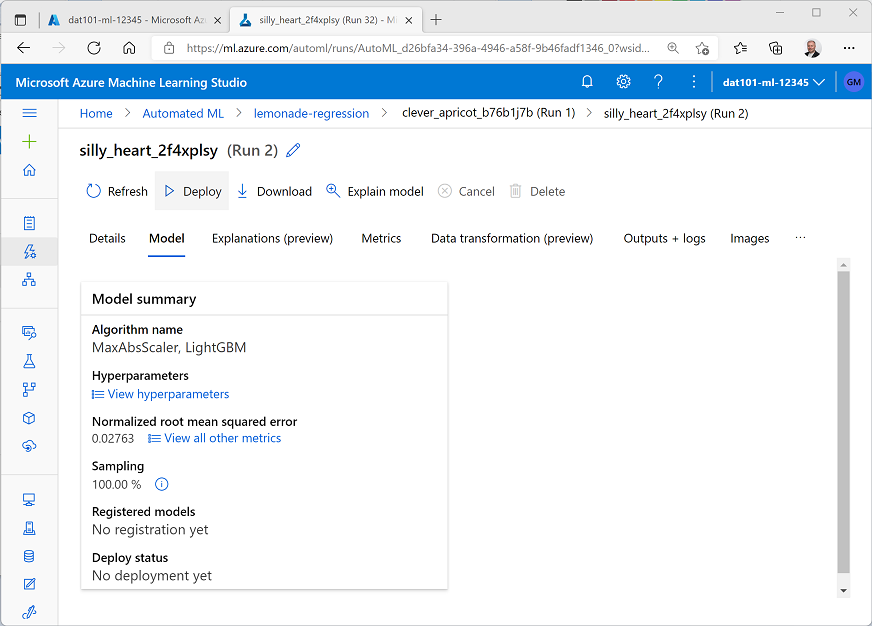
When training has completed, click the algorithm name in the Best model summary section.
-
In the page for the best model, click ▷ Deploy.
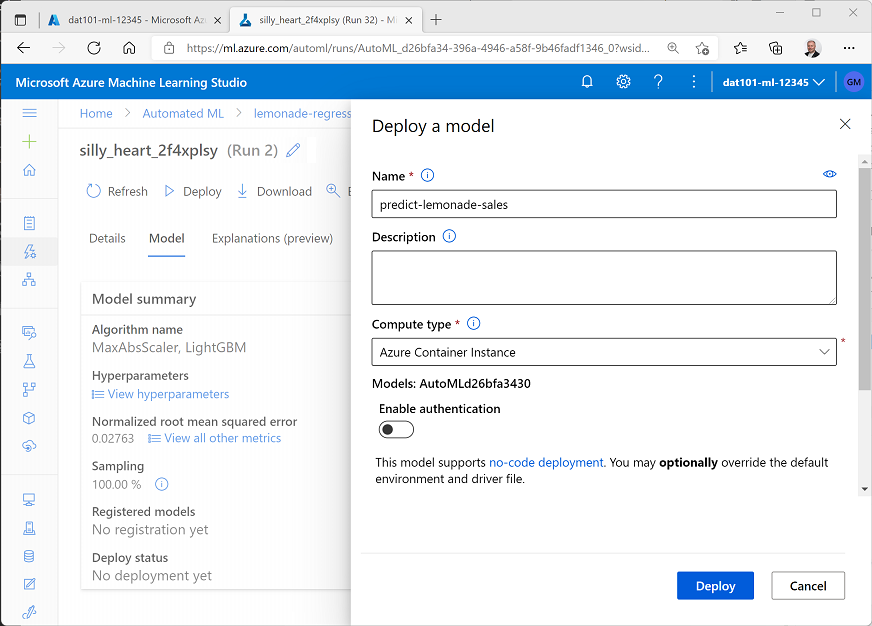
- In the Deploy model pane, enter the following details and click Deploy:
- Name: predict-lemonade-sales
- Description leave blank
- Compute type: Azure Container Instance
- Enable authentication: Unselected
-
Wait for the model to deploy, monitoring the Deploy status until it changes from Running to Succeeded (this may take a while - you can click ↻ Refresh to check for updated status).
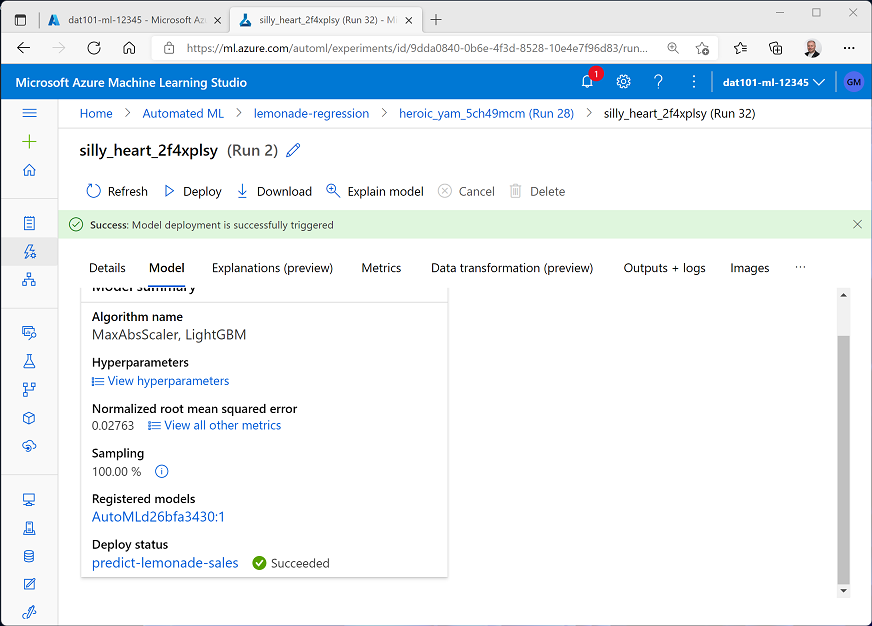
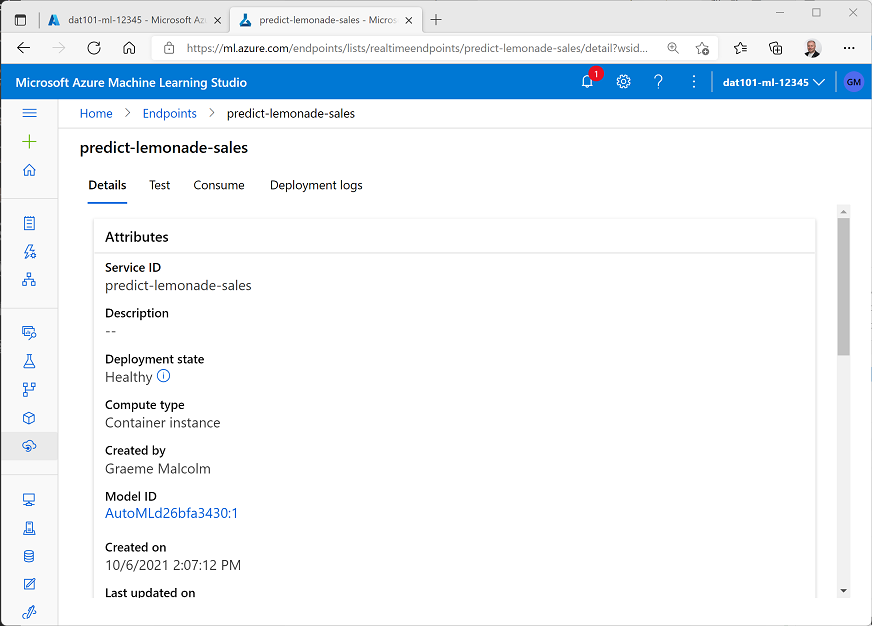
-
To view the deployed endpoint, click predict-lemonade-sales under Deploy status, and verify that it has a Deployment state of Healthy.
Test the deployed model
Now that you’ve deployed the model to a web service endpoint, you can test it by submitting new data for a day and predicting the number of lemonade sales to be expected.
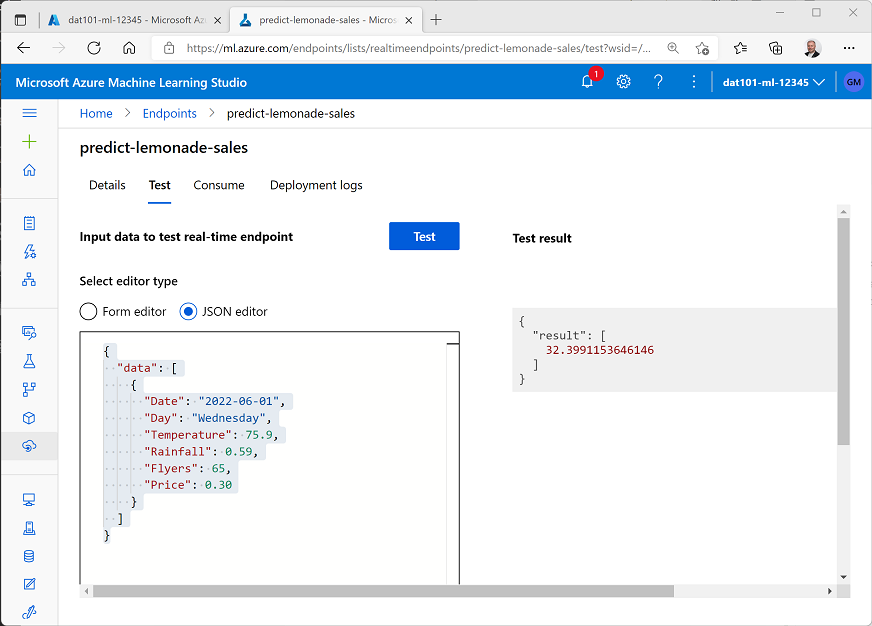
- In the predict-lemonade-sales endpoint page, click the Test tab.
-
On the Test page, select JSON editor. Then replace the default JSON data with the following, and click Test:
 {
   "data": [
     {
     "Date": "2022-06-01",
     "Day": "Wednesday",
     "Temperature": 75.9,
     "Rainfall": 0.59,
     "Flyers": 65,
     "Price": 0.30
     }
   ]
 }
Note JSON is a common format that applications use to exchange data with web services. In this case, the JSON contains data about the day for which we want to predict lemonade sales.
-
Review the result, which represents the estimated number of lemonade sales (the prediction may be a fractional number, so you should round it to the nearest whole number to determine how many lemonades Rosie is predicted to sell on that day.)
- Try modifying the JSON data to change the data and day, temperature, rainfall, or the number of flyers distributed and testing the model to see how many lemonade sales it predicts.
Clean up resources
When you’ve finished exploring Azure Machine Learning, you should delete the Azure resources you created to avoid incurring unnecessary credit usage in your subscription.
- Close Azure Machine Learning Studio and return to the Azure portal.
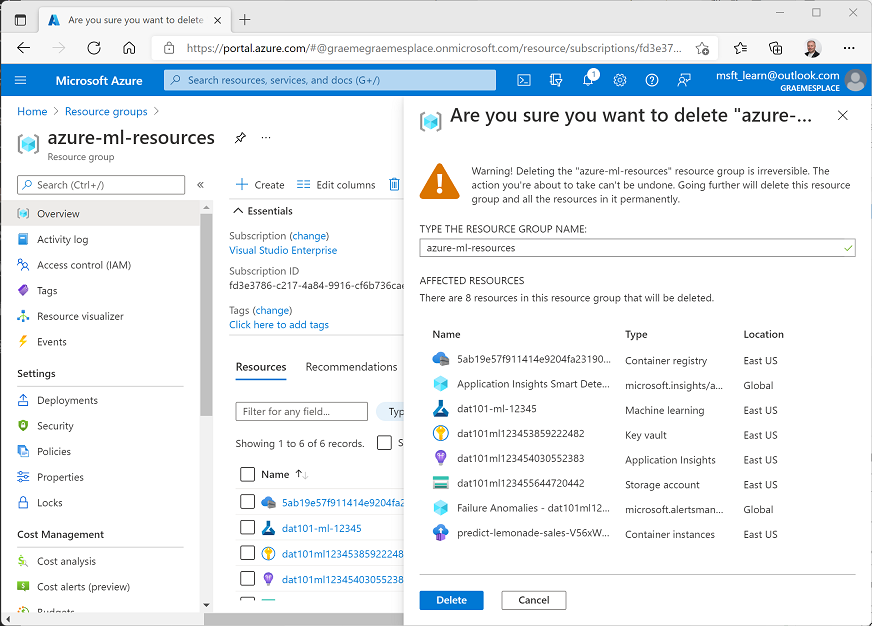
- On the Home page, select Resource Groups, and then on the Resource groups page, select the resource group you created when provisioning your Azure Machine Learning resources.
-
On the page for your resource group, click Delete resource group, and then enter the resource group name to confirm before clicking Delete.
| < Back | Next > |