Classify images with the Custom Vision Service
The Computer Vision cognitive service provides useful pre-built models for working with images, but you’ll often need to train your own model for computer vision. For example, suppose the Northwind Traders retail company wants to create an automated checkout system that identifies the grocery items customers want to buy based on an image taken by a camera at the checkout. To do this, you’ll need to train a classification model that can classify the images to identify the item being purchased.
In Azure, you can use the Custom Vision cognitive service to train an image classification model based on existing images. There are two elements to creating an image classification solution. First, you must train a model to recognize different classes using existing images. Then, when the model is trained you must publish it as a service that can be consumed by applications.
Create a Custom Vision resource
To use the Custom Vision service, you need an Azure resource that you can use to train a model, and a resource with which you can publish it for applications to use. The resource for either (or both) tasks can be a general Cognitive Services resource, or a specific Custom Vision resource. You can use the same Cognitive Services resource for each of these tasks, or you can use different resources (in the same region) for each task to manage costs separately.
Use the following instructions to create a new Custom Vision resource.
- In a new browser tab, open the Azure portal at https://portal.azure.com, and sign in using the Microsoft account associated with your Azure subscription.
- Select the +Create a resource button, search for custom vision, and create a Custom Vision resource with the following settings:
- Create options: Both
- Subscription: Your Azure subscription
- Resource group: Create a new resource group with a unique name
- Name: Enter a unique name
- Training location: Choose any available region
- Training pricing tier: Free F0
- Prediction location: The same region as the training resource
- Prediction pricing tier: Free F0
Note: If you already have an F0 custom vision service in your subscription, select S0 for this one.
- Wait for the resources to be created, and note that two Custom Vision resources are provisioned; one for training, and another for prediction. You can view these by navigating to the resource group where you created them.
Create a Custom Vision project
To train an object detection model, you need to create a Custom Vision project based on your training resource. To do this, you’ll use the Custom Vision portal.
- Download and extract the training images from https://aka.ms/fruit-images. These images are provided in a zipped folder, which when extracted contains subfolders called apple, banana, and orange.
- In another browser tab, open the Custom Vision portal at https://customvision.ai. If prompted, sign in using the Microsoft account associated with your Azure subscription and agree to the terms of service.
- In the Custom Vision portal, create a new project with the following settings:
- Name: Grocery Checkout
- Description: Image classification for groceries
- Resource: The Custom Vision resource you created previously
- Project Types: Classification
- Classification Types: Multiclass (single tag per image)
- Domains: Food
-
Click [+] Add images, and select all of the files in the apple folder you extracted previously. Then upload the image files, specifying the tag apple, like this:
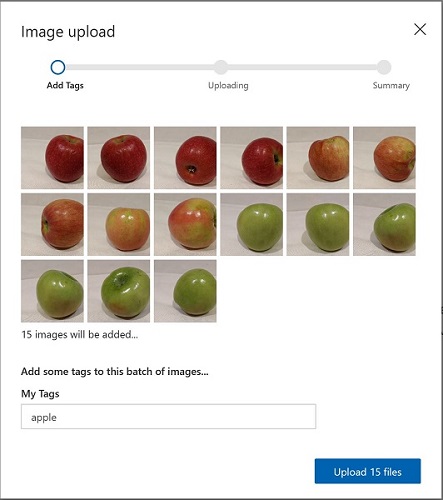
- Repeat the previous step to upload the images in the banana folder with the tag banana, and the images in the orange folder with the tag orange.
-
Explore the images you have uploaded in the Custom Vision project - there should be 15 images of each class, like this:
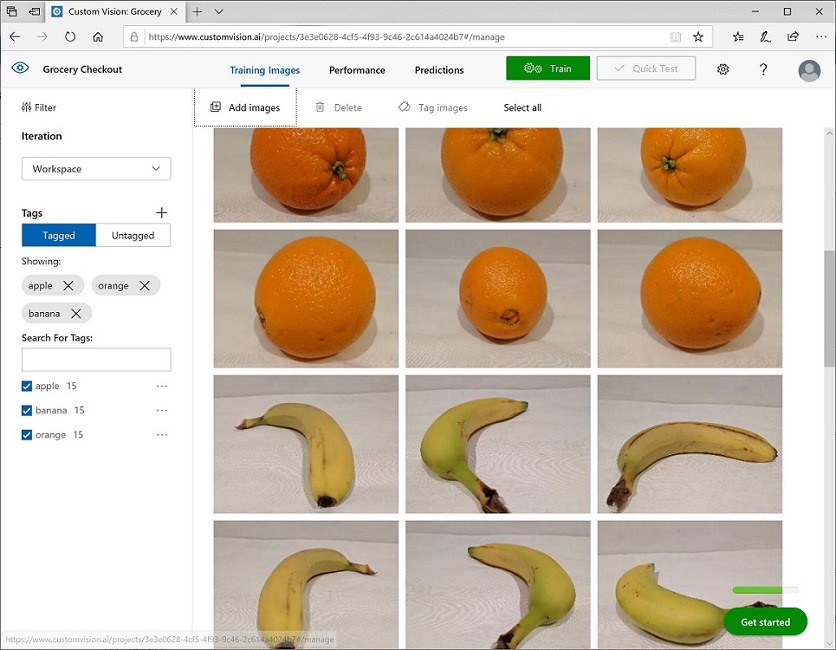
- In the Custom Vision project, above the images, click Train to train a classification model using the tagged images. Select the Quick Training option, and then wait for the training iteration to complete (this may take a minute or so).
- When the model iteration has been trained, review the Precision, Recall, and AP performance metrics - these measure the prediction accuracy of the classification model, and should all be high.
Test the model
Before publishing this iteration of the model for applications to use, you should test it.
- Above the performance metrics, click Quick Test.
- In the Image URL box, type
https://aka.ms/apple-imageand click ➔ -
View the predictions returned by your model - the probability score for apple should be the highest, like this:
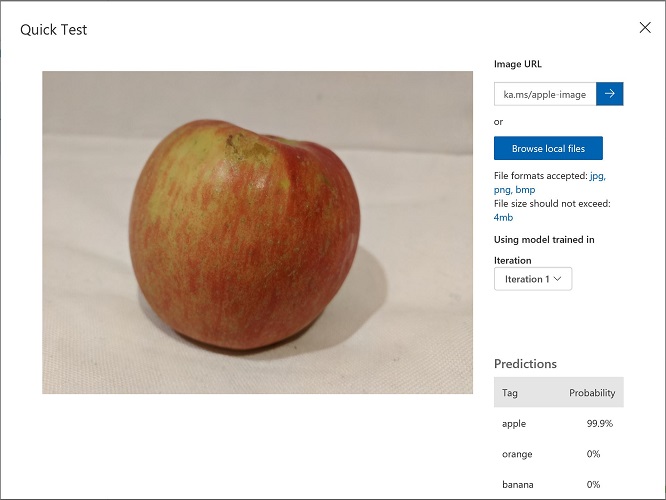
- Close the Quick Test window.
Publish the image classification model
Now you’re ready to publish your trained model and use it from a client application.
- Click 🗸 Publish to publish the trained model with the following settings:
- Model name: groceries
- Prediction Resource: The prediction resource you created previously.
-
After publishing, click the Prediction URL (🌐) icon to see information required to use the published model, which should look like this:
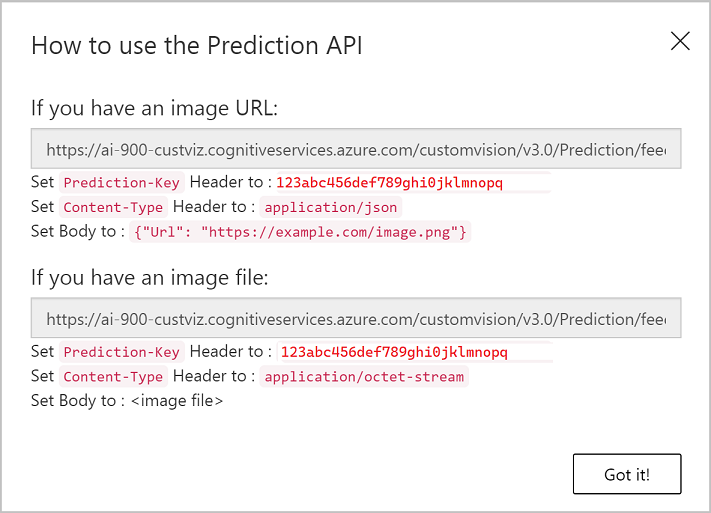
Later, you will need the appropriate URL and Prediction-Key values to get a prediction from an Image URL, so keep this dialog box open and carry on to the next task.
Use a cloud shell
To test the capabilities of the Custom Vision service, we’ll use a simple command-line application that runs in the cloud shell.
Note: For this lab, you will test out an application in a cloud shell environment. When you build your own application, you can use an environment of your choice.
-
Click the Activate Sandbox button at the top of the page. This starts a Cloud Shell instance to your right, as shown here. You may be prompted to review permissions. Click Accept.

-
When you open the cloud shell, you will need to change the type of shell you are using from Bash to PowerShell. Type in pwsh and press enter.
pwsh
Configure and run a client application
Now that you have a cloud shell environment, you can run a simple client application that uses the Computer Vision service to analyze an image.
-
In the command shell, enter the following command to download the sample application.
git clone https://github.com/GraemeMalcolm/ai-stuff ai-900 -
The files are downloaded to a folder named ai-900. Now we want to see all of the files in your cloud shell storage and work with them. Type the following command into the shell:
code .Notice how this opens up an editor.
-
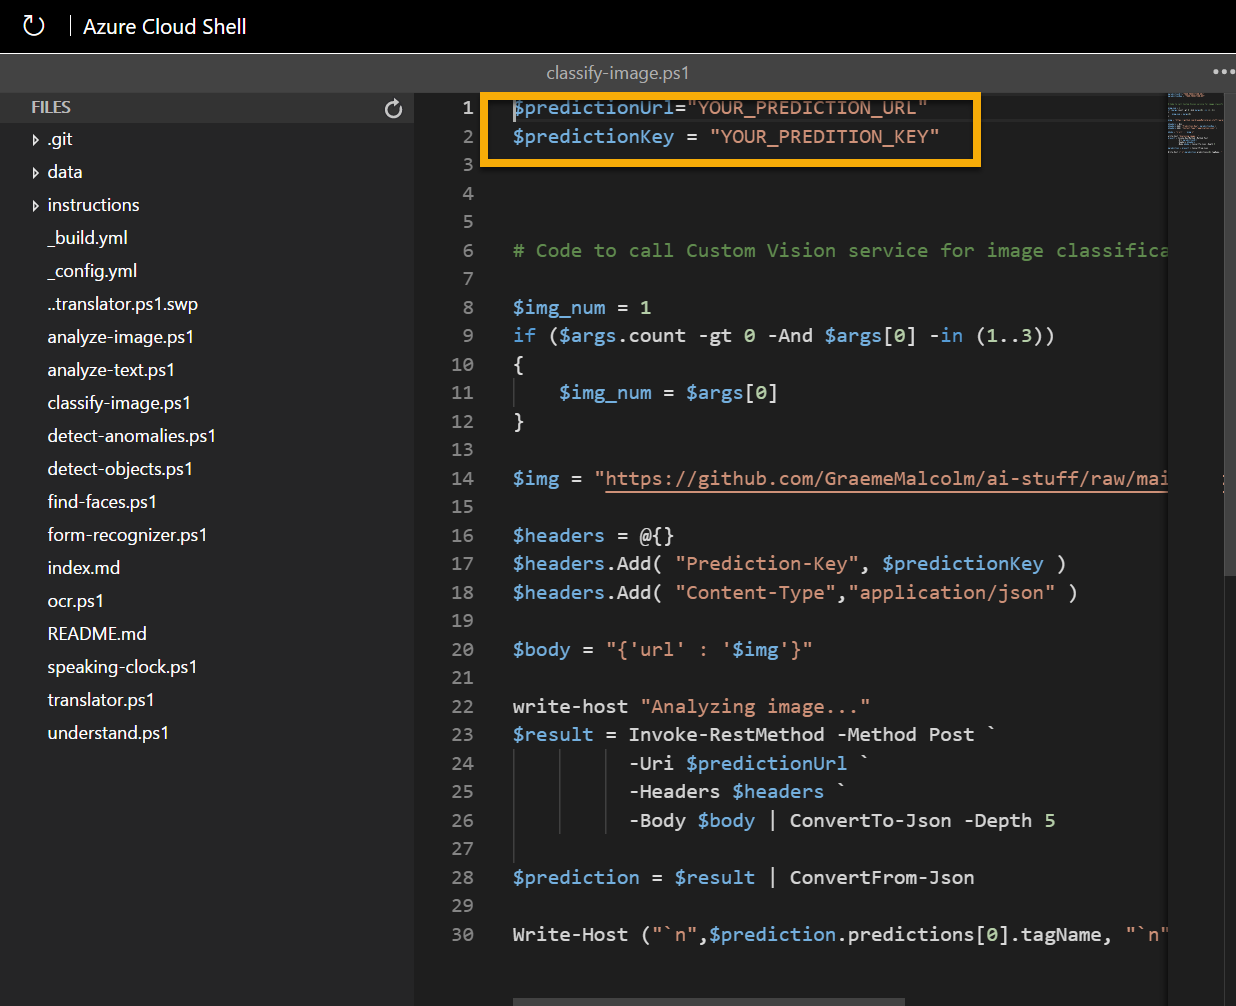
In the Files pane on the left, expand ai-900 and select classify-image.ps1. This file contains some code that uses the Custom Vision model to analyze an image, as shown here:
-
Don’t worry too much about the details of the code, the important thing is that it needs the prediction URL and key for your Custom Vision model when using an image URL. Copy these from the prediction URL dialog box in your Custom Vision project (which should still be open in another browser tab) and paste them into the code editor, replacing the YOUR_PREDICTION_URL and YOUR_PREDICTION_KEY placeholder values respectively.
After pasting the endpoint and key values, the first two lines of code should look similar to this:
$predictionUrl="https://mycv.cognitiveservices.azure.com/.../groceries/url" $predictionKey = "123abc456def789ghi0klmnopq" -
At the top right of the editor pane, use the … button to open the menu and select Save to save your changes. Then open the menu again and select Close Editor.
You will use the sample client application to classify the following images:
1 2 3 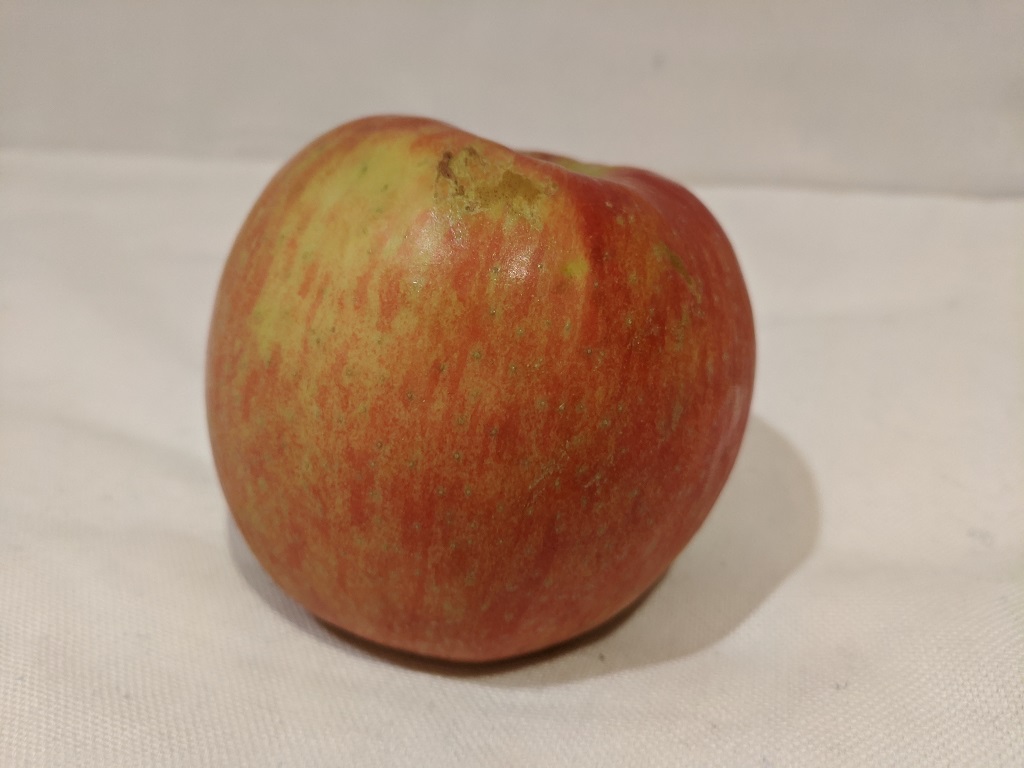
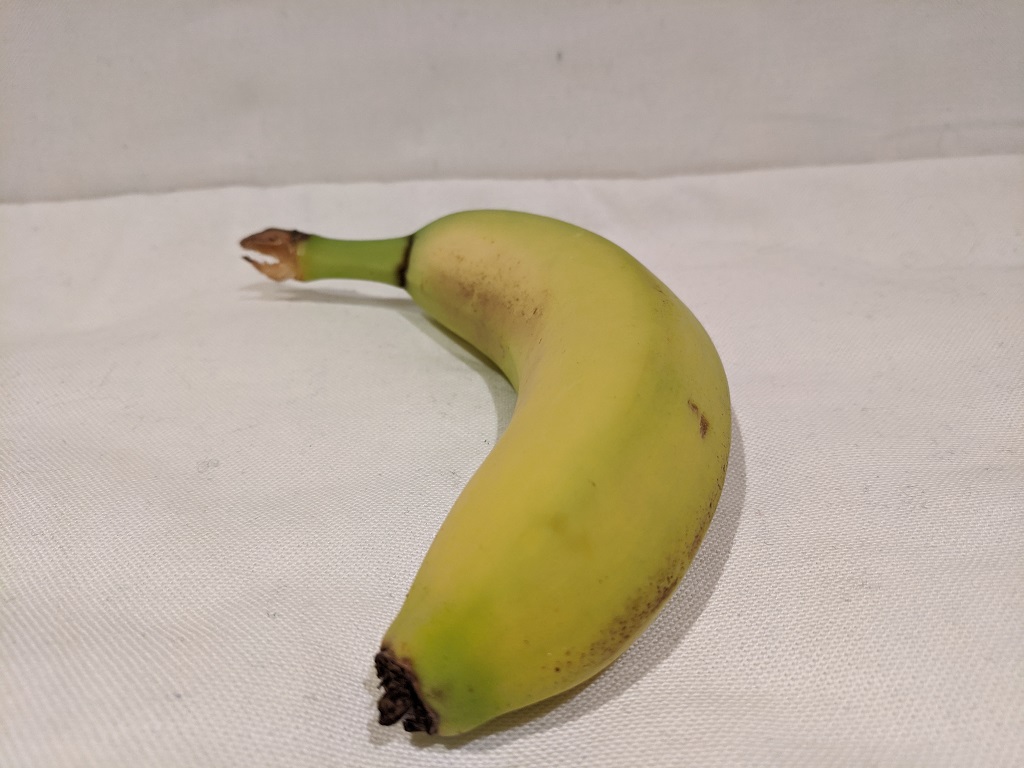
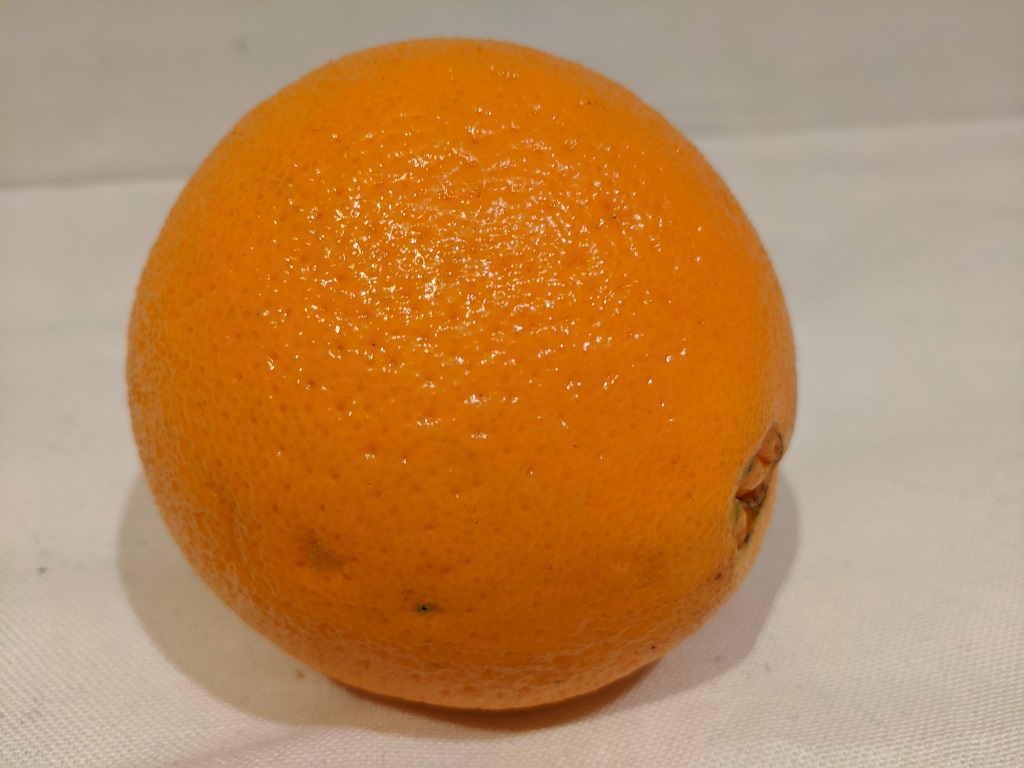
-
In the PowerShell pane, enter the following commands to run the code:
cd ai-900 .\classify-image.ps1 1 -
Review the prediction, which should be apple.
-
Now let’s try another image:
.\classify-image.ps1 2 -
Verify that the model classifies this image as banana.
-
Finally, let’s try the third test image:
.\classify-image.ps1 3 -
Verify that the model classifies this image as orange.
Learn more
This simple app shows only some of the capabilities of the Custom Vision service. To learn more about what you can do with this service, see the Custom Vision page.