Analyze Faces with the Face Service
Computer vision solutions often require an artificial intelligence (AI) solution to be able to detect, analyze, or identify human faces. or example, suppose the retail company Northwind Traders has decided to implement a “smart store”, in which AI services monitor the store to identify customers requiring assistance, and direct employees to help them. One way to accomplish this is to perform facial detection and analysis - in other words, determine if there are any faces in the images, and if so analyze their features.
Create a Face resource
Let’s start by creating a Face resource in your Azure subscription:
- In another browser tab, open the Azure portal at https://portal.azure.com, signing in with your Microsoft account.
- Click the +Create a resource button, search for Face, and create a Face resource with the following settings:
- Subscription: Your Azure subscription.
- Resource group: Select an existing resource group or create a new one.
- Region: Choose any available region
- Name: Enter a unique name.
- Pricing tier: Free F0
- Notices: Scroll down if necessary, and select any required checkbox for notices relevant to your selected region.
- Review and create the resource, and wait for deployment to complete. Then go to the deployed resource.
- View the Keys and Endpoint page for your Face resource. You will need the endpoint and keys to connect from client applications.
Use a cloud shell
To test the capabilities of the Custom Vision service to detect objects in images, we’ll use a simple command-line application that runs in the cloud shell.
Note: For this lab, you will test out an application in a cloud shell environment. When you build your own application, you can use an environment of your choice.
-
Click the Activate Sandbox button at the top of the page. This starts a Cloud Shell instance to your right, as shown here. You may be prompted to review permissions. Click Accept.

-
When you open the cloud shell, you will need to change the type of shell you are using from Bash to PowerShell. Type in pwsh and press enter.
pwsh
Configure and run a client application
Now that you have a cloud shell environment, you can run a simple client application that uses the Computer Vision service to analyze an image.
-
In the command shell, enter the following command to download the sample application.
git clone https://github.com/GraemeMalcolm/ai-stuff ai-900 -
The files are downloaded to a folder named ai-900. Now we want to see all of the files in your cloud shell storage and work with them. Type the following command into the shell:
code .Notice how this opens up an editor.
-
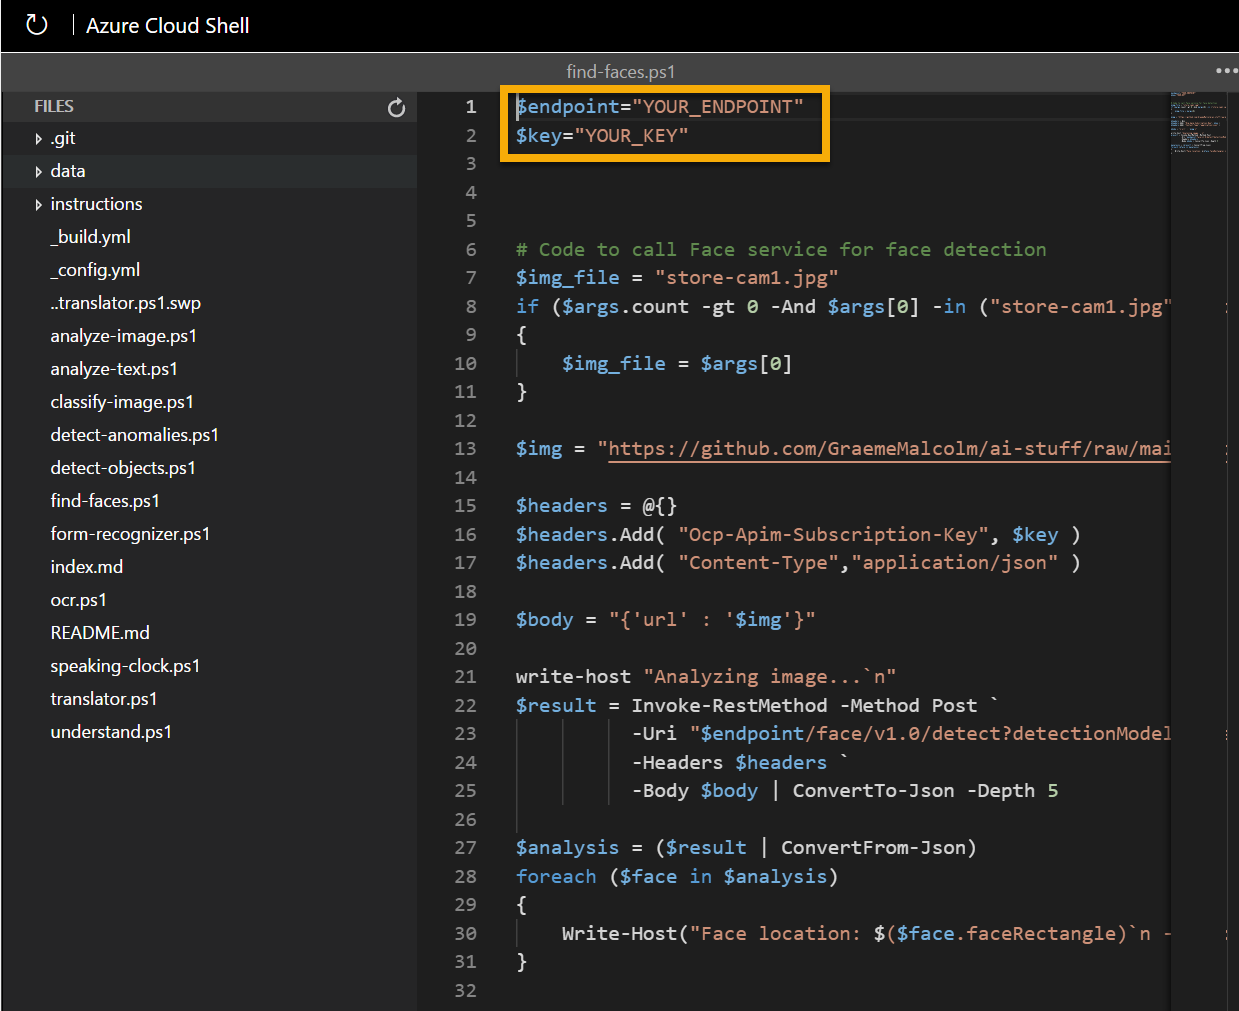
In the Files pane on the left, expand ai-900 and select find-faces.ps1. This file contains some code that uses the Face service to detect and analyze faces in an image, as shown here:

-
Don’t worry too much about the details of the code, the important thing is that it needs the endpoint URL and either of the keys for your Face resource. Copy these from the Keys and Endpoints page for your resource (which should still be in the top area of the browser) and paste them into the code editor, replacing the YOUR_ENDPOINT and YOUR_KEY placeholder values respectively.
Tip: You may need to use the separator bar to adjust the screen area as you work with the Keys and Endpoint and Editor panes.
After pasting the endpoint and key values, the first two lines of code should look similar to this:
$endpoint="https://resource.cognitiveservices.azure.com/" $key="1a2b3c4d5e6f7g8h9i0j...." -
At the top right of the editor pane, use the … button to open the menu and select Save to save your changes. Then open the menu again and select Close Editor.
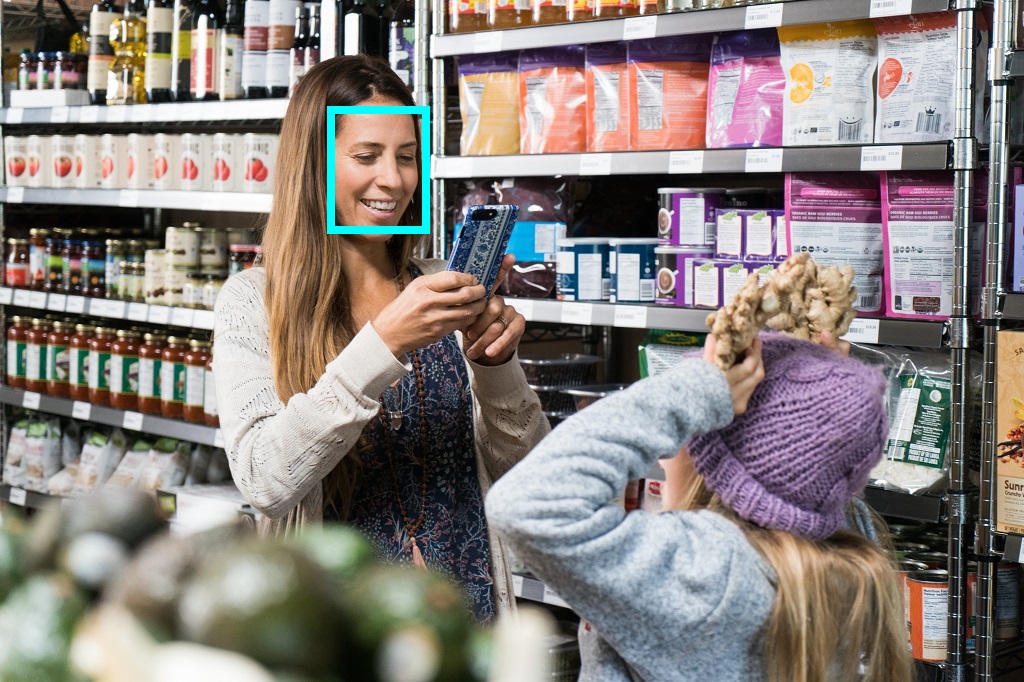
The sample client application will use your Face service to analyze the following image, taken by a camera in the Northwind Traders store:

-
In the PowerShell pane, enter the following commands to run the code:
cd ai-900 .\find-faces.ps1 store-cam1.jpg - Review the details of the faces found in the image, which include:
- The location of the face in the image
- The approximate age of the person
- An indication of the emotional state of the person (based on proportional scores for a range of emotions)
Note that the location of a face is indicated by the top- left coordinates, and the width and height of a bounding box, as shown here:

-
Now let’s try another image:

To analyze the second image, enter the following command:
.\find-faces.ps1 store-cam2.jpg -
Review the results of the face analysis for the second image.
-
Let’s try one more:

To analyze the third image, enter the following command:
.\find-faces.ps1 store-cam3.jpg - Review the results of the face analysis for the third image.
Learn more
This simple app shows only some of the capabilities of the Face service. To learn more about what you can do with this service, see the Face page.