Use Delta Lake with Spark in Azure Synapse Analytics
Delta Lake is an open source project to build a transactional data storage layer on top of a data lake. Delta Lake adds support for relational semantics for both batch and streaming data operations, and enables the creation of a Lakehouse architecture in which Apache Spark can be used to process and query data in tables that are based on underlying files in the data lake.
This lab will take approximately 30 minutes to complete.
Before you start
You’ll need an Azure subscription in which you have administrative-level access.
Provision an Azure Synapse Analytics workspace
You’ll need an Azure Synapse Analytics workspace with access to data lake storage and an Apache Spark pool that you can use to query and process files in the data lake.
In this exercise, you’ll use a combination of a PowerShell script and an ARM template to provision an Azure Synapse Analytics workspace.
- Sign into the Azure portal.
-
Use the [>_] button to the right of the search bar at the top of the page to create a new Cloud Shell in the Azure portal, selecting a PowerShell environment and creating storage if prompted. The cloud shell provides a command line interface in a pane at the bottom of the Azure portal, as shown here:
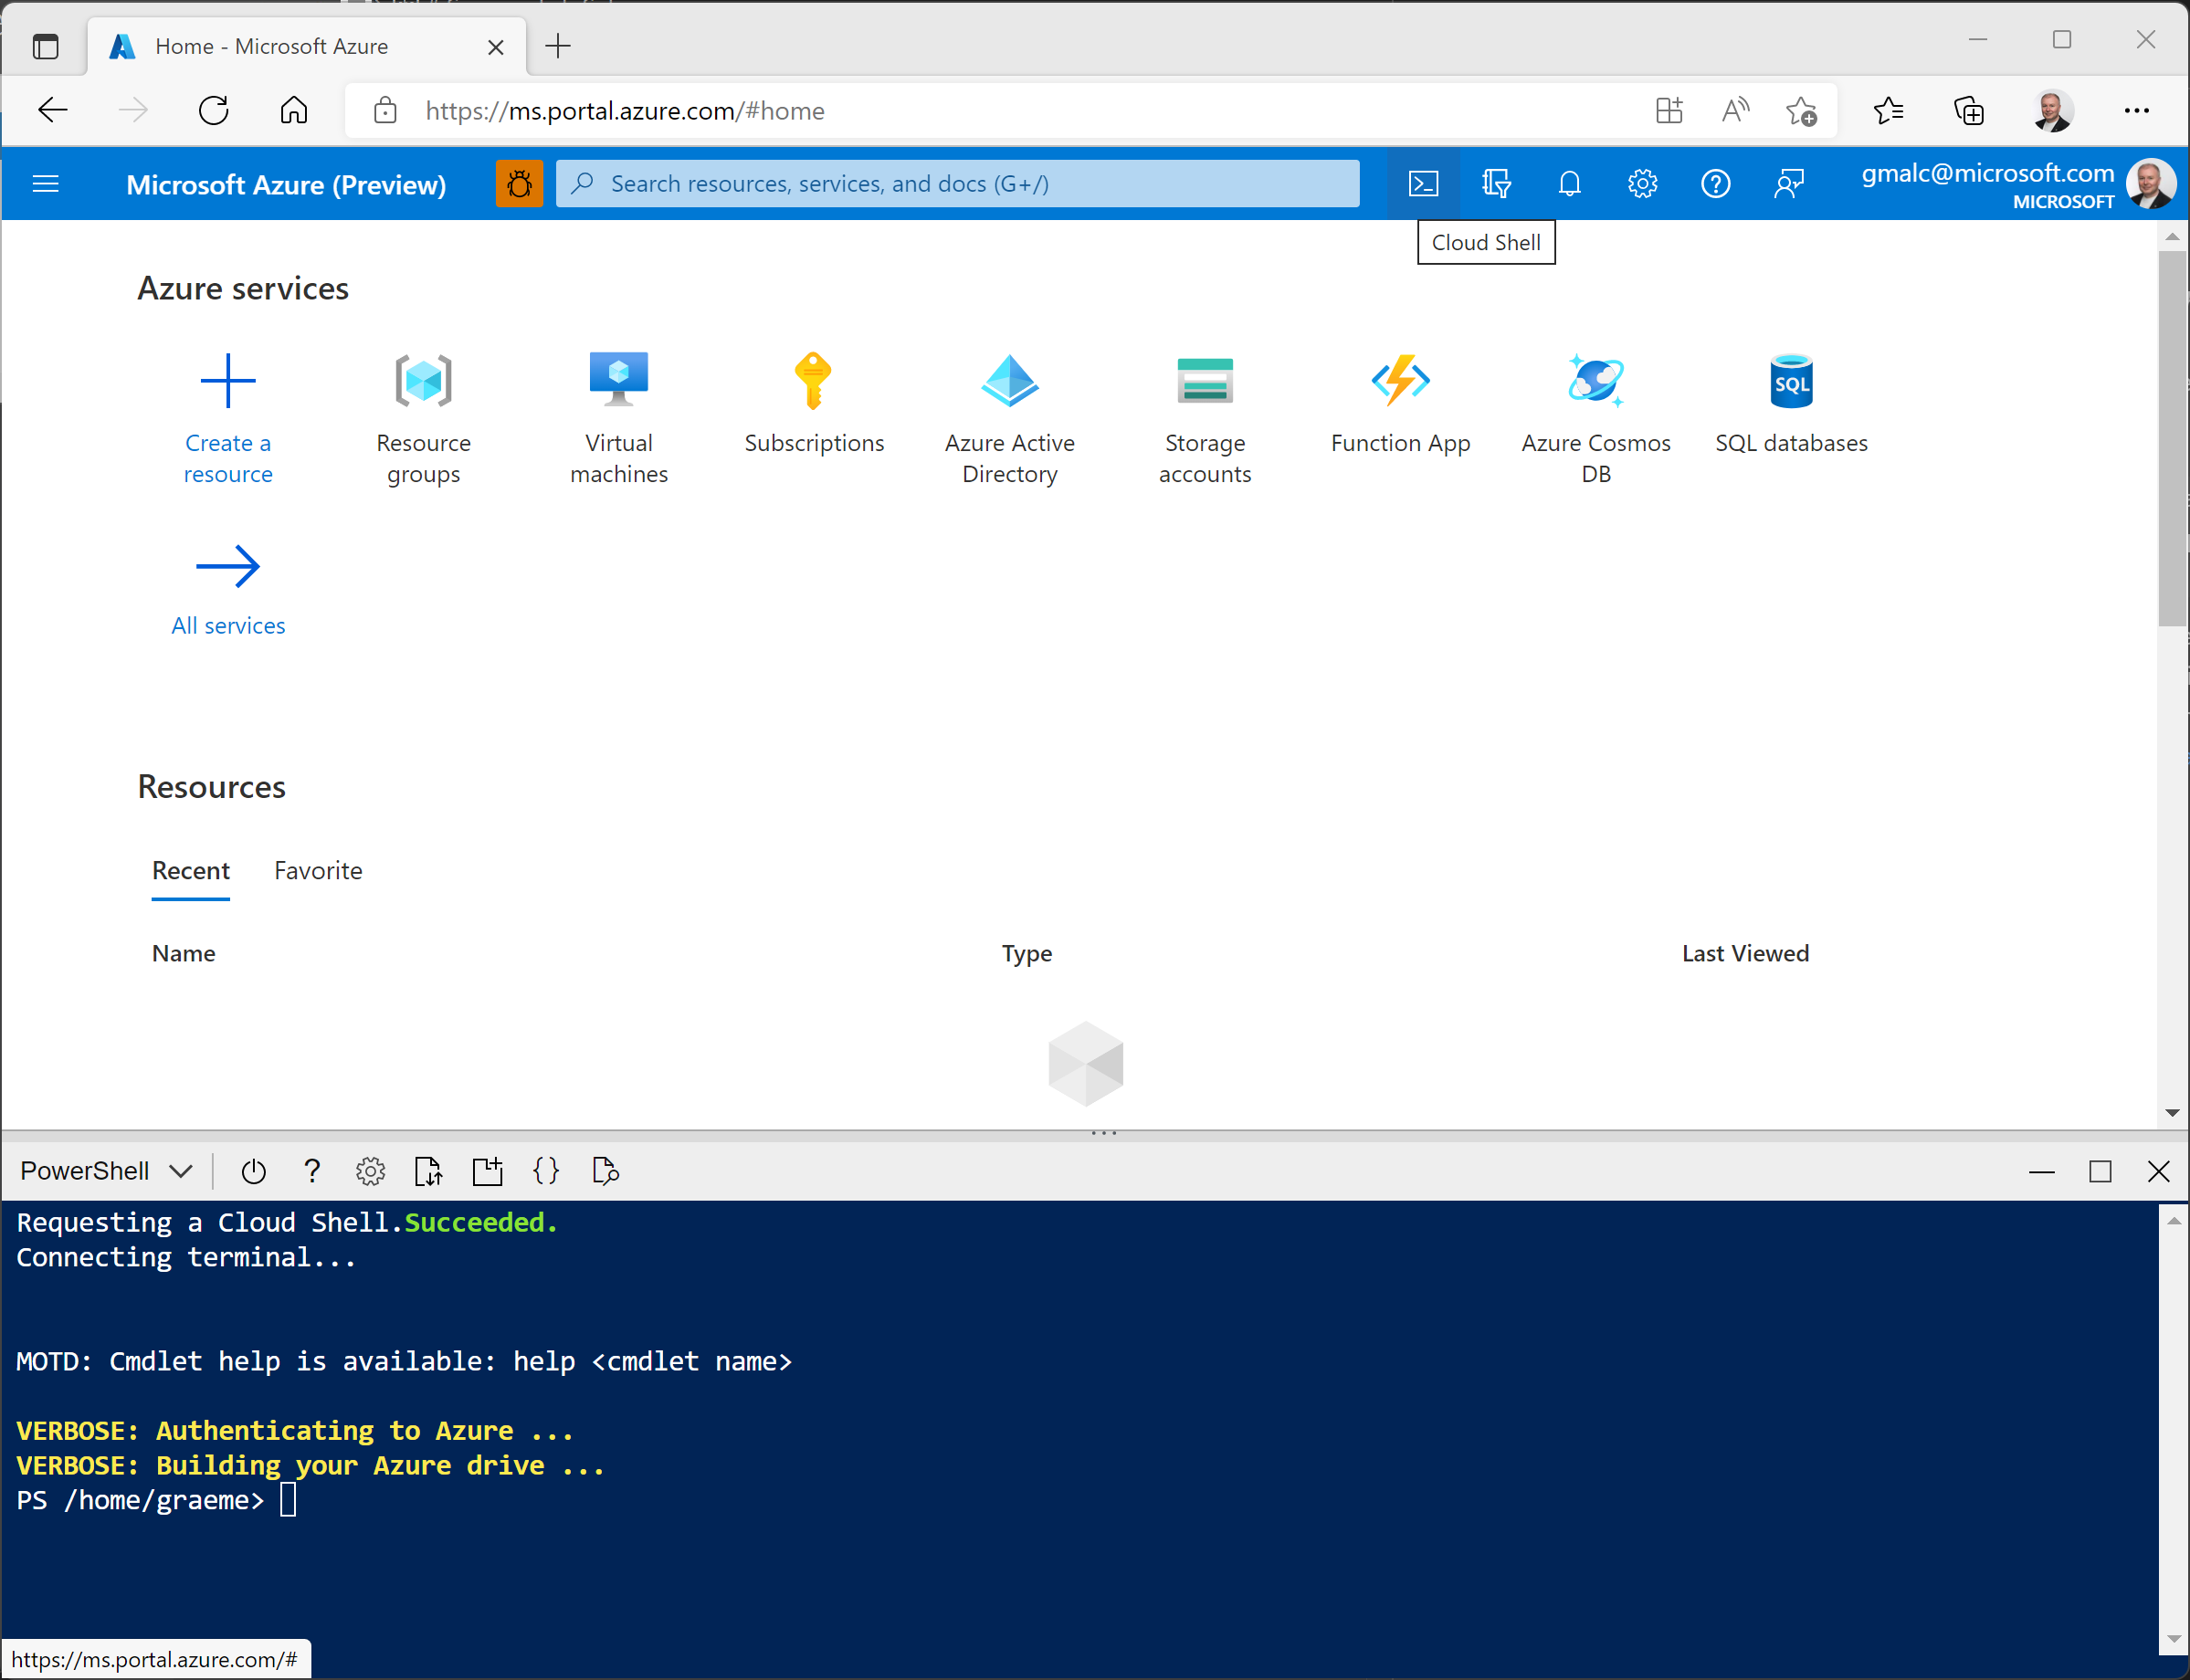
Note: If you have previously created a cloud shell that uses a Bash environment, use the the drop-down menu at the top left of the cloud shell pane to change it to PowerShell.
-
Note that you can resize the cloud shell by dragging the separator bar at the top of the pane, or by using the —, ◻, and X icons at the top right of the pane to minimize, maximize, and close the pane. For more information about using the Azure Cloud Shell, see the Azure Cloud Shell documentation.
-
In the PowerShell pane, enter the following commands to clone this repo:
rm -r dp-000 -f git clone https://github.com/GraemeMalcolm/data-engineer dp-000 -
After the repo has been cloned, enter the following commands to change to the folder for this lab and run the setup.ps1 script it contains:
cd dp-000/Allfiles/Labs/05 ./setup.ps1 -
When prompted, enter a suitable password to be set for your Azure Synapse SQL pool.
Note: Be sure to remember this password!
- Wait for the script to complete - this typically takes around 10 minutes, but in some cases may take longer. While you are waiting, review the What is Delta Lake article in the Azure Synapse Analytics documentation.
Create delta tables
The script provisions an Azure Synapse Analytics workspace and an Azure Storage account to host the data lake, then uploads a data file to the data lake.
Explore the data in the data lake
- After the script has completed, in the Azure portal, go to the dp000-xxxxxxx resource group that it created, and select your Synapse workspace.
- In the Overview page for your Synapse workspace, in the Open Synapse Studio card, select Open to open Synapse Studio in a new browser tab; signing in if prompted.
- On the left side of Synapse Studio, use the ›› icon to expand the menu - this reveals the different pages within Synapse Studio that you’ll use to manage resources and perform data analytics tasks.
- On the Data page, view the Linked tab and verify that your workspace includes a link to your Azure Data Lake Storage Gen2 storage account, which should have a name similar to synapsexxxxxxx (Primary - datalakexxxxxxx).
- Expand your storage account and verify that it contains a file system container named files.
- Select the files container, and note that it contains folders named products and synapse. The synapse folder is used by Azure Synapse, and the products folder contains the data you are going to work with in this exercise.
- Open the products folder, and observe that it contains a file named products.csv.
- Select products.csv, and then in the New notebook list on the toolbar, select Load to DataFrame.
- In the Notebook 1 pane that opens, in the Attach to list, select the sparkxxxxxxx Spark pool and ensure that the Language is set to PySpark (Python).
-
Review the code in the first (and only) cell in the notebook, which should look like this:
%%pyspark df = spark.read.load('abfss://files@datalakexxxxxxx.dfs.core.windows.net/products/products.csv', format='csv' ## If header exists uncomment line below ##, header=True ) display(df.limit(10)) -
Uncomment the ,header=True line (because the products.csv file has the column headers in the first line), so your code looks like this:
%%pyspark df = spark.read.load('abfss://files@datalakexxxxxxx.dfs.core.windows.net/products/products.csv', format='csv' ## If header exists uncomment line below , header=True ) display(df.limit(10)) -
Use the ▷ icon to the left of the code cell to run it, and wait for the results. The first time you run a cell in a notebook, the Spark pool is started - so it may take a minute or so to return any results. Eventually, the results should appear below the cell, and they should be similar to this:
ProductID ProductName Category ListPrice 771 Mountain-100 Silver, 38 Mountain Bikes 3399.9900 772 Mountain-100 Silver, 42 Mountain Bikes 3399.9900 … … … …
Load the file data into a delta table
-
Under the results returned by the first code cell, use the + Code button to add a new code cell. Then enter the following code in the new cell and run it:
delta_table_path = "/delta/products-delta" df.write.format("delta").save(delta_table_path) -
On the files tab, use the ↑ icon in the toolbar to return to the root of the files container, and note that a new folder named delta has been created. Open this folder and the products-delta table it contains, where you should see the parquet format file(s) containing the data.
-
Return to the Notebook 1 tab and add another new code cell. Then, in the new cell, add the following code and run it:
 from delta.tables import *
 from pyspark.sql.functions import *

 # Create a deltaTable object
 deltaTable = DeltaTable.forPath(spark, delta_table_path)

 # Update the table (reduce price of product 771 by 10%)
 deltaTable.update(
     condition = expr("ProductID == 771"),
     set = { "ListPrice": expr("ListPrice * 0.9") })

 # View the updated data as a dataframe
 deltaTable.toDF().show(10)
The data is loaded into a deltaTable object and updated. You can see the update reflected in the query results.
-
Add another new code cell with the following code and run it:
 new_df = spark.read.format("delta").load(delta_table_path)
 new_df.show(10)
The code loads the delta table data into a data frame from its location in the data lake, verifying that the change you made via a deltaTable object ihas been persisted.
-
Modify the code you just ran as follows, specifying the option to use the time travel feature of delta lake to view a previous version of the data.
 new_df = spark.read.format("delta").option("versionAsOf", 0).load(delta_table_path)
 new_df.show(10)
When you run the modified code, the results show the original version of the data.
-
Add another new code cell with the following code and run it:
deltaTable.history(10).show(20, False, True)The history of the last 20 changes to the table is shown - there should be two (the original creation, and the update you made.)
Create catalog tables
So far you’ve worked with delta tables by loading data from the folder containing the parquet files on which the table is based. You can define catalog tables that encapsulate the data and provide a named table entity that you can reference in SQL code. Spark supports two kinds of catalog tables for delta lake:
- External tables that are defined by the path to the parquet files containing the table data.
- Managed tables, that are defined in the Hive metastore for the Spark pool.
Create an external table
-
In a new code cell, add and run the following code:
 spark.sql("CREATE TABLE ProductsExternal USING DELTA LOCATION '{0}'".format(delta_table_path))
 spark.sql("DESCRIBE EXTENDED ProductsExternal").show(truncate=False)
This code creates an external tabled named ProductsExternal based on the path to the parquet files you defined previously. It then displays a description of the table’s properties. Note tat the Location property is the path you specified.
-
Add a new code cell, and then enter and run the following code:
 %%sql

 SELECT * FROM ProductsExternal
The code uses SQL to query the ProductsExternal table.
Create a managed table
-
In a new code cell, add and run the following code:
 df.write.format("delta").saveAsTable("ProductsManaged")
 spark.sql("DESCRIBE EXTENDED ProductsManaged").show(truncate=False)
This code creates a managed tabled named ProductsManaged based on the DataFrame you originally loaded from the products.csv file (before you updated the price of product 771). You do not specify a path for the parquet files used by the table - this is managed for you in the Hive metastore, and shown in the Location property in the table description (in the files/synapse/workspaces/synapsexxxxxxx/warehouse path).
-
Add a new code cell, and then enter and run the following code:
 %%sql

 SELECT * FROM ProductsManaged
The code uses SQL to query the ProductsManaged table.
Compare external and managed tables
-
In a new code cell, add and run the following code:
 %%sql

 SHOW TABLES
This code lists the tables in the metastore for your Spark pool. Note that both tables are defined in the default database.
-
In a new code cell, add and run the following code:
 %%sql

 DROP TABLE IF EXISTS ProductsExternal;
 DROP TABLE IF EXISTS ProductsManaged;
This code drops the tables from the metastore.
- Return to the files tab and view the files/delta/products-delta folder. Note that the data files still exist in this location. Dropping the external table has removed the table from the metastore, but left the data files intact.
- View the files/synapse/workspaces/synapsexxxxxxx/warehouse folder, and note that there is no folder for the ProductsManaged table data. Dropping a managed table removes the table from the metastore and also deletes the table’s data files.
Delete Azure resources
If you’ve finished exploring Azure Synapse Analytics, you should delete the resources you’ve created to avoid unnecessary Azure costs.
- Close the Synapse Studio browser tab and return to the Azure portal.
- On the Azure portal, on the Home page, select Resource groups.
- Select the dp000-xxxxxxx resource group for your Synapse Analytics workspace (not the managed resource group), and verify that it contains the Synapse workspace, storage account, and Spark pool for your workspace.
- At the top of the Overview page for your resource group, select Delete resource group.
-
Enter the dp000-xxxxxxx resource group name to confirm you want to delete it, and select Delete.
After a few minutes, your Azure Synapse workspace resource group and the managed workspace resource group associated with it will be deleted.